Drawing for several clients? Keep a house style per client next to your own, and choose it per home. Exports, the view link and the embed of that home then carry the client.
This is for teams. An owner or admin sets it up.
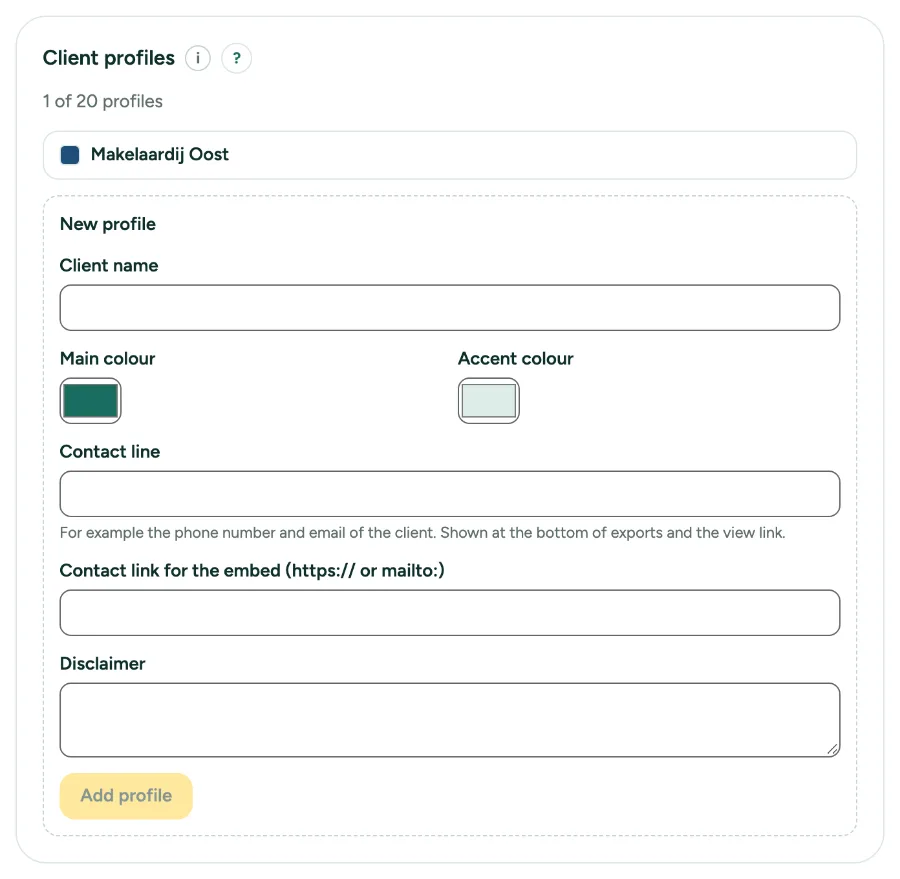
Client profiles: step by step
1. Add a profile
Open Settings, tab Office, and go to Client profiles. Under New profile, type the Client name, pick a Main colour and Accent colour, and if you like a Contact line, a Contact link for the embed and a Disclaimer. Click Add profile. A team has up to 20 profiles.
2. Add a logo
Open the profile and choose a Logo (PNG, JPEG or WebP, up to 512 KB). Without a logo, exports use the logo of the office.
3. Choose it per home
Open My homes, choose a home and pick the Client profile. Pick House style of the office to go back.
4. What follows the profile
PDF, PNG, JPG and SVG show the client name, colours, logo and contact line; the DXF title block names the client; the view link shows the name, contact line and disclaimer; the embed shows the logo and the contact link.
Messages you may see
- You have 20 client profiles, the most for one team. Remove one first.
- There is already a profile with this name.
- These colours are hard to read. Choose a darker main colour or a lighter accent colour.
- Only an owner or admin can change client profiles.