Four elevations drawn from your plan: walls, doors and windows at their sill and height, the roof, levels and sizes. Flat and to scale.
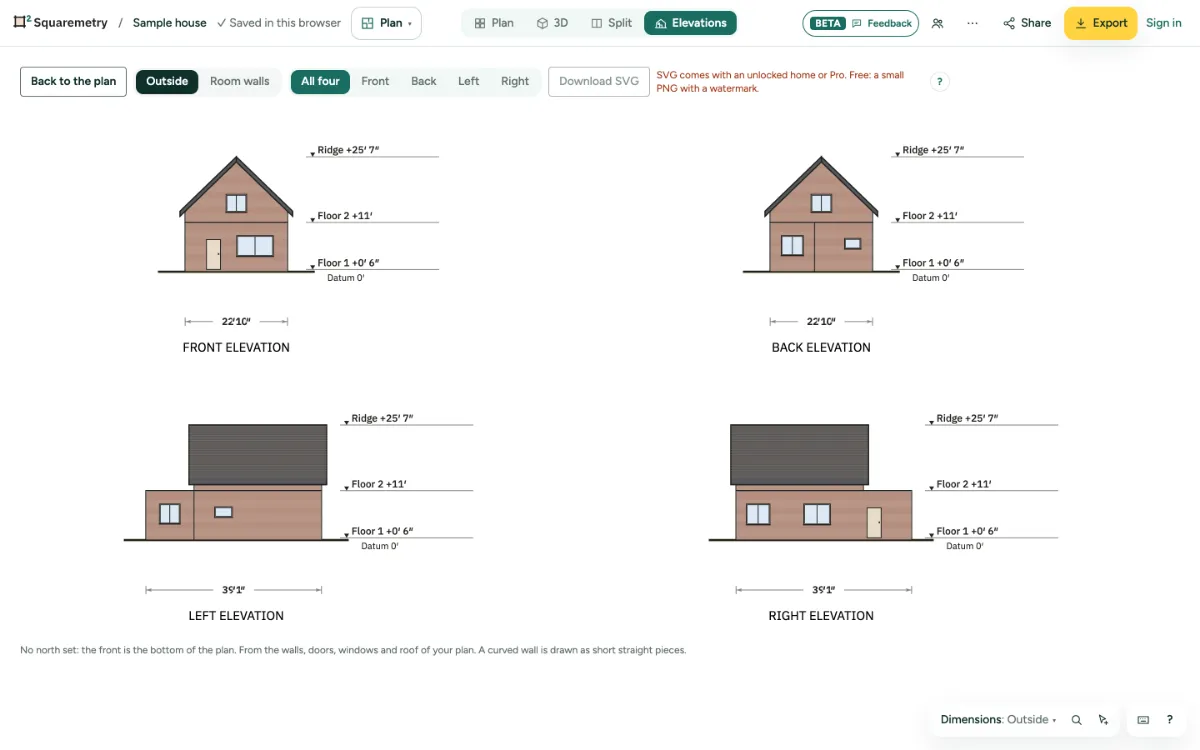
Elevations of the four sides: step by step
1. Open the elevations
In Plan, click ⋯ next to the views in the top bar and choose Elevations (in Sheets Elevations stands on its own), or search it with ⌘K. On a phone: More, View, Elevations.
2. Which sides
With north set (Place, tab North) you get North, East, South and West. Without north: Front, Back, Left and Right; the front is the bottom of the plan.
3. Read the drawing
Each floor at its height, doors and windows at their sill and height, and the roof. On the right the levels (ridge, floors, the datum P = 0, a basement), under the house one size: its outside width, the same number as the total on the plan. A detached shed or summerhouse is not in the elevation of the house; an attached garage is.
4. Materials
When a wall has a build-up, its outside layer shows in its colour with joints, such as brick. A wall without a build-up stays plain.
5. Save or export
With an unlocked home, Pro or Team, Download SVG saves what you see; without, the button says why. In Export, with an unlocked home, Pro or Team, tick Elevations: all four on one sheet, or one per page in the PDF and one file each for PNG, JPG, SVG and DXF. The DXF has its own layers for walls, joints, openings, roof and grade.
Messages you may see
- Nothing to show yet. Draw a room or walls on the plan first.