Add dimensions that read the plan, notes, arrows, lines, areas, tables from the plan and images. A dimension on a wall corner follows the wall; a table of rooms changes when the plan changes.
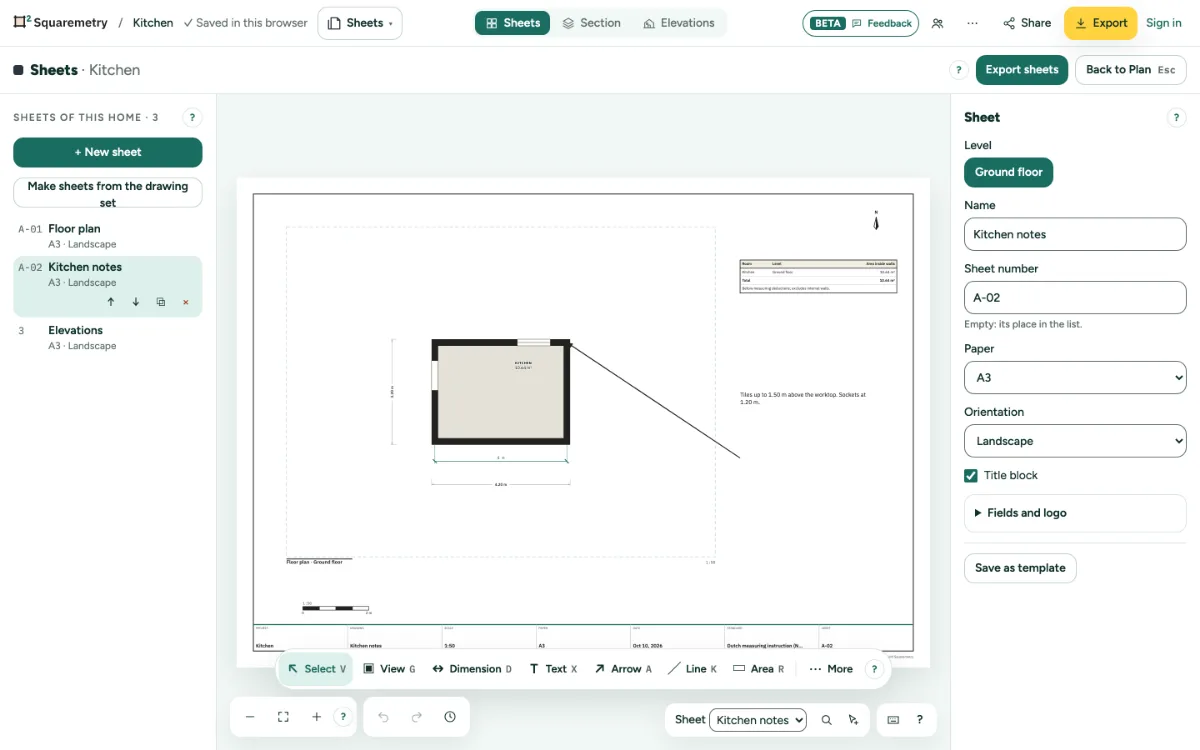
Draw on a sheet: dimensions, notes, tables and images: step by step
1. Dimension
Pick Dimension (D) and click two points in a view. In a floor plan a point on a wall corner snaps to that corner: move the wall in the plan and the dimension changes. Its card shows what it reads and the distance from the points.
2. Notes
Pick Text (X) and click where the note starts. Type in its card; choose the size and bold, and the width of the box.
3. Arrows, lines and areas
Pick Arrow (A), Line (K) or Area (R) and drag on the sheet. In the card: arrow at the end or both ends, dashed, line weight, the colour and outline of an area.
4. Tables
Pick Table under More (T) and choose Rooms and areas (with a total of floor area inside walls, before measuring deductions and excluding interior walls; this is not the GO total), Electrical and plumbing count, or List of sheets; from Systems also Panel schedule, Floor heating circuits and Mounting heights (the usual height of each symbol kind and your own heights). A table shows the plan as it is now, for all levels or one. As a view you can also place the Single-line diagram and the Floor heating layout of a level. A table stops above the title block: its last line then says how many rows are on the sheet, and its card says what you can do.
5. Images
Pick Image (I) and choose a PNG or JPEG: a photo, a logo or a detail. We make it smaller to keep the plan light. Up to 4 per sheet.
6. More: angle
The basic tools stay in the bar; More has the rest: Scrapbook (S), Table, Image and the tools below. Angle (N): click a point on the first side, then the corner, then a point on the second side, all in one view. A point on a wall corner follows that wall, so the angle changes with the plan.
7. More: label
Label (L): click a room in a floor plan view. The label reads the room at that point: Room name, Area, Size and Level are fields you add with one click, and they change when you rename the room or move a wall. Your own words stay as you type them.
8. More: draw and CSV
Draw (P): click to add points, double-click or Enter to finish, click the first point to close. Its card shows the length on paper and, inside a view, in the plan at that scale. Table from a CSV file puts a table from a file on the sheet (semicolon, comma or tab; up to 100 rows of 12 columns); it does not follow the plan.
Shortcuts
- D
- Sheets: dimension
- X
- Sheets: text
- A
- Sheets: arrow
- K
- Sheets: line
- R
- Sheets: area
- I
- Sheets: image
- N
- Sheets: angle
- L
- Sheets: label
- P
- Sheets: draw
- S
- Sheets: scrapbook
- T
- Sheets: table
- ⌫
- Delete what is chosen
Messages you may see
- Click inside a view to measure.
- A 3D view is not to scale. Measure in a plan, elevation or section.
- A wall of this dimension is gone. Draw the dimension again.
- The text runs off the sheet. Make the box wider or the text shorter.
- This file is not a PNG or JPEG image.
- A sheet holds up to 4 images.
- The three points must not lie on one line. Click again.
- A label reads a room: click inside a floor plan view.
- There is no room at the point of this label. Place the label again.
- This file is not a CSV table. Save the table as CSV and try again.
- The table does not fit on the sheet: 47 of 60 rows are on it. Move the table up or choose larger paper. What does not fit is not in the export.