Bring a CAD drawing in as an underlay to trace, or let the editor turn its wall lines into walls you can edit.
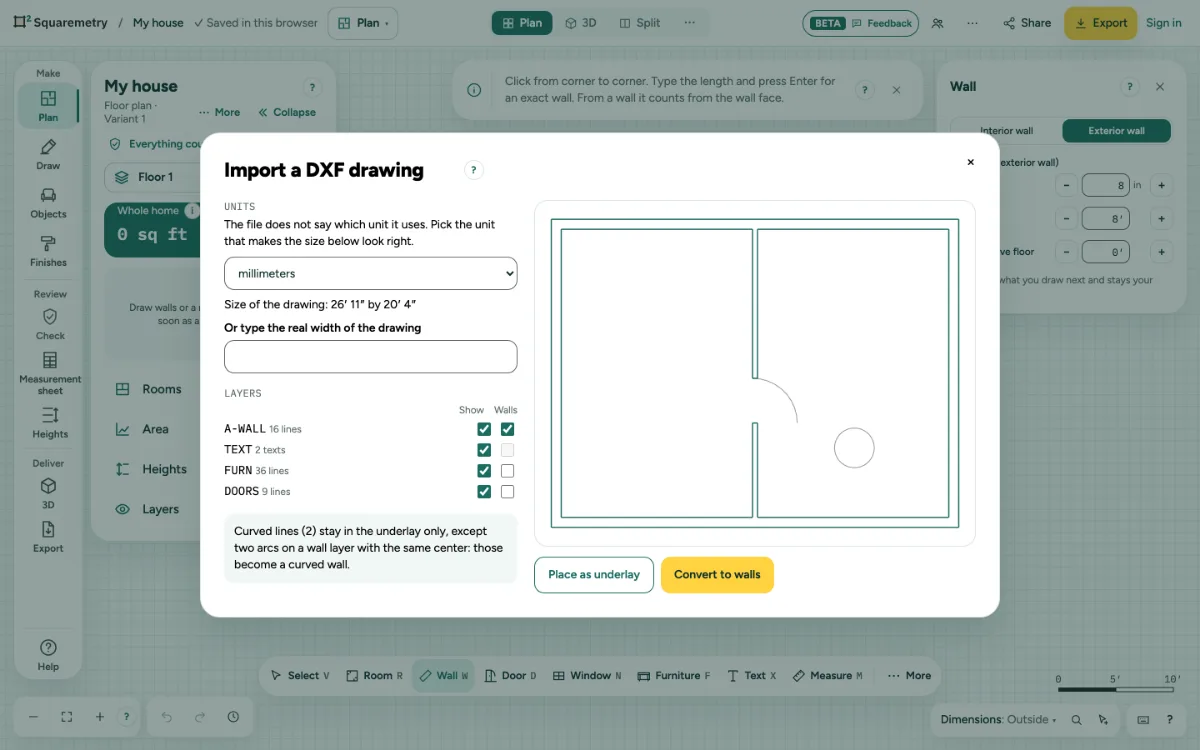
Import a DXF drawing: step by step
1. Pick the file
Click … at the top right, open File and choose Import DXF…, or drag a .dxf file onto the page.
2. Check the units
Under Units, keep the unit from the file, pick another, or type the real width. Without a unit in the file, the size of the drawing shows below; if another unit also gives a sensible size, a button names it with that size, like Not right? Choose centimeters (15 m by 10 m).
3. Choose layers
Under Layers, choose which to show and which hold walls.
4. Underlay or walls
Choose Place as underlay or Convert to walls. For walls, check the result and click the button with the number of walls, like Add 12 walls. One undo takes them all away.
5. Remove the underlay
Click … at the top right, open File and choose Remove the DXF underlay.
Messages you may see
- This is a DWG file, and we cannot read DWG. In your CAD program, choose Save as, pick DXF (ASCII), and import that file.
- No walls found on these layers. We look for two parallel lines 5 to 60 cm (2 to 24 in) apart. Try other layers.