Add a floor for every level of the home. Set heights, put a roof on top, and try variants of a floor. A room with nothing below it gets a warning.
Floors, heights, roofs and variants: step by step
1. Where things are
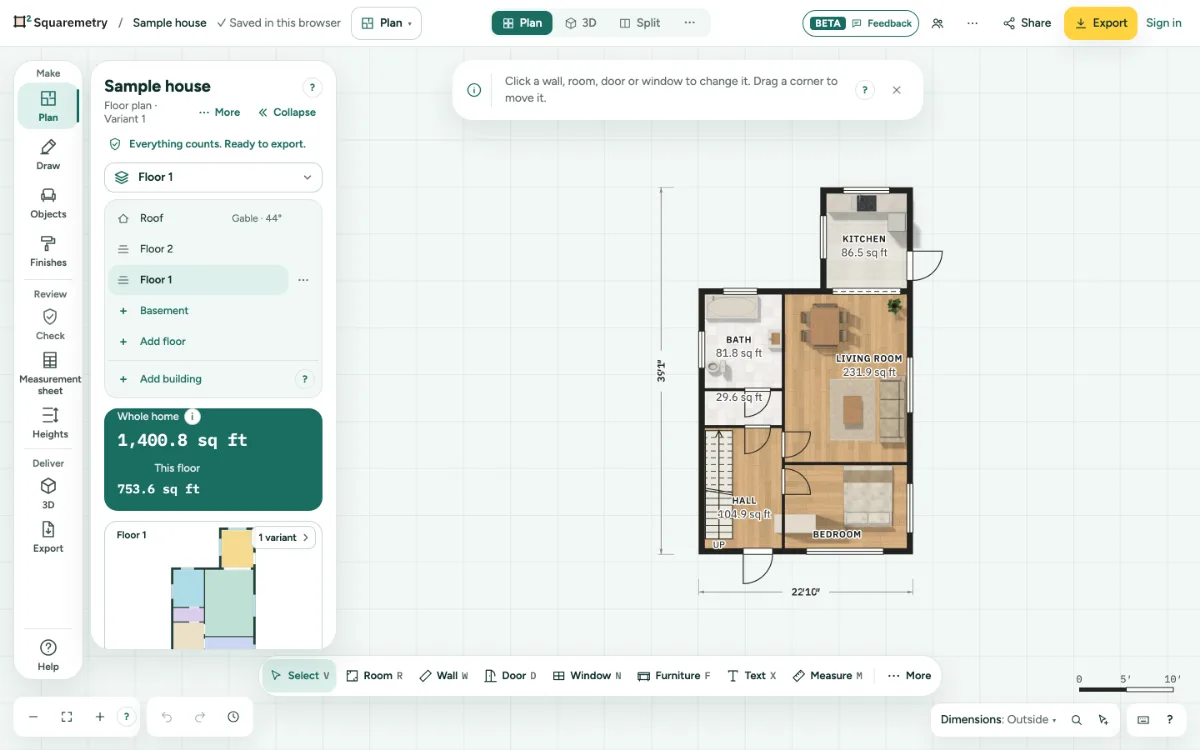
The left panel reads from top to bottom: the name of the home, with Floor plan · Variant 1, More and Collapse below it; the points to check (one line with the number and Show, or a tick when everything counts); the floor field; the variants button with a small plan of the active variant; a small teal block with the area of the Whole home, and This floor next to it when the home has more floors; a colour overview of the floor (each room in the colour of its type, dark walls with doors and windows, and on the ground floor the garden and outbuildings; click a room to open it); and rows: Rooms, Area (with what counts), Heights, Layers and This building. More holds Duplicate variant, This floor and, in red at the bottom, Delete this variant…. A room opens with its Type, Size, Show dimensions, Floor and Settings, and under More: Walls and ceiling and Items in this room; in remodel mode also Renovation. Everything is at most two clicks away.
2. Add a floor
Click the floor field in the left panel, like Floor 1, and then Add floor. The floor below shows faintly, and new walls snap onto it. The new floor goes on top of the building, above its top floor by level height, and the roof moves up to it. Undo takes you back to the floor you were on.
3. Switch floors
Click the floor field at the top of the Plan panel (Home · Ground floor): the list opens with the floors as the building stands, the top floor at the top and the basement at the bottom, and Roof above them all. Pick a floor and the list closes. When the Plan panel is closed, in 3D and in Side by side, the same field sits on the left of the drawing. Esc closes the list without changing anything. Or press PgUp and PgDn (also ⌥↑ and ⌥↓) to go up or down a floor; a short message names the floor. With one floor nothing happens. Roof takes you to the floor that carries the roof and opens the roof window; without a roof it starts with the shapes.
4. This floor
At the top of the left panel, click More and then This floor to rename the floor, copy it, turn the plan 90°, mirror it or delete the floor. Copy this floor copies everything on the floor: walls, doors and windows, rooms with their borders, voids and openings, stairs, furniture, symbols, pipes and cables, raised areas, balconies, photo points and the shapes from Model, so the copy measures exactly like the original. A stair to another floor becomes a manual stair on the copy, and a stairwell whose stair stands on another floor becomes a separate opening with its own shape on the copy. Copy the top floor and the roof with its dormers moves to the copy on top. Comments stay on the original, and the message says so. On the copy, text tied to a wall, door, window or room keeps showing its size, also for a room without a name. Turning takes every floor along, with the roof, stairwells, outbuildings, the height zones under the roof, the plot and the north arrow, so the area stays the same. Mirroring keeps the area exactly the same too, and saved 3D views turn and mirror along. The roof sits in its own row at the top of the floor list. Back, or Esc, takes you to the list. Whichever floor you copy, the copy goes on top of the building and the roof moves to it. Delete a floor and its roof goes to the floor directly below it if that floor has no roof; otherwise the roof goes with it. The storey above stays at its height. Undo brings everything back. Mirroring flips every angle too: a turned piece of furniture becomes its true mirror image and escape route arrows point the other way.
5. Heights
New upper levels use the next level number for that building; a basement does not increase it. An existing name is skipped. In the left panel, click Heights. Each level with its height above the ground floor and its wall height, from the top floor down: Ground floor P = 0 and 2.60 m. Click a number, type a new one like 2.8 or 260 cm and press Enter; the levels above move with it. A wall height between 1.00 and 10.00 m; otherwise one line next to the field says so, and Esc puts the old value back. A wall height below a door or window on that level is refused the same way, with the limit in that line. Under a sloped roof the row says Follows the roof with the eaves and the ridge; click it to open the roof window. Rooms that differ show indented under their floor, like a lowered ceiling or a sloped ceiling; click one to open its card at Ceiling and height. Under a sloped roof a room with its own ceiling shows too, also a flat one: that ceiling counts, not the roof. The sketch below is for dragging a level up or down; on a phone it sits behind Sketch. Align levels lines up two levels on a stair or a chosen point. Everything on the level moves along, also the shapes and sections from Model. With a floor above, a lower wall height cuts off the ceilings below it at the new height: everything under it stays exactly as it was, also the low part of a Sloped or Vaulted ceiling and the edge of a Tray, and above it the ceiling is flat. A ceiling shape that lies entirely above the new height is removed, with a message. A basement works the other way round: make it taller or deeper and the basement moves down with what is below it, while the ground floor stays at P = 0. In the sketch you grab a ceiling at its height line on the right; elsewhere you grab the nearest level line. A roof that starts on the walls stays on the walls when the wall height changes, and a roof never starts higher than the walls.
6. Nothing below this room
A room that reaches past the walls of the level below gets the chip Nothing below this room. In the list: Move it over the level below, Fit to the floor below, or Keep it as an overhang. Each is one undo step.
7. Variants
Click More at the top of the left panel and choose Duplicate variant, or click the variants button, like 1 variant, with the small plan. Each variant is a row with a small plan: click one to work on it, or click Duplicate to try another layout. Rename or delete the variant you work on below the rows. Delete this variant… under More first asks Delete this variant? and says which variant on which floor goes; Undo brings it back. A floor always keeps one variant. Only the variant you work on counts in the totals and exports.
8. A roof on any shape
The roof follows the outline of the level. An L, T or U shape gets a ridge per wing and a valley where two wings meet; the plan shows the eaves, ridges, hips and valleys as dashed lines. Curved or angled walls fall back to the rectangle around the level, and the Roof panel says so. The gross volume on the Measurement sheet (Review) follows the same roof, dormers included.
9. Roof parts
Give part of a level its own roof, for example a flat extension of 1 × 4 m next to a gable roof over 3 × 4 m. Open the Roof window (the Roof row in the floor list), find Roof parts and click Add roof part. Or search Add roof part with ⌘K, or choose it in the ⋯ menu of the Roof row. Then click a room: the roof part becomes that room, out to the outside of its façades. Or drag a rectangle over the part. Esc or the × in the hint stops; on a tablet or phone you tap the room. A new roof part is flat, and the Roof window opens on it: choose the shape, pitch, ridge, overhang, Roof starts at, dormers and covering, just as for the main roof. ‹ Roof goes back to the main roof, which covers the rest of the level. Where two roof parts overlap, the newest one wins and a message says how much, for example: "This roof part partly overlaps Roof over Conservatory (1.20 m²): this roof lies there now." Review names it too (Roof parts overlap), with Open. While the window shows a roof part, handles on its edges in the plan let you make it bigger or smaller. Remove roof part at the bottom takes it away: "Roof part removed. Undo brings it back." Remove roof only removes the main roof. When nothing is made, a message says why: "Too small. Drag at least 0.50 m." "Outside the level: draw the part over the rooms." "Floor 1 lies above Kitchen: no roof can lie there." "At most 8 roof parts per level." "Choose a room with square corners, or drag a rectangle." "Touches no façade: draw the part up to a façade." "Too many corners in the roof parts together: drag a rectangle, or remove a roof part first." Each roof counts on its own part of the level: under a flat roof part there is no strip lower than 1.50 m (5 ft), and the gross volume counts all roofs. The plan, 3D, the section, the elevations, the exports and the measurement report show every roof. Copy a level and the copy gets its roof parts; when the level below ends up fully underneath, they move along. Add a level on top and the main roof moves up, while the roof parts stay on their own level. A roof on a level that lies partly under a higher level is drawn only on the free part: the same roof shape with the piece under the higher level cut away, in the plan, 3D, the elevations and the exports (the measurement already did so). Want a roof of its own on that free part, for example a gable roof on an extension? Draw a roof part over it.
10. Pitch per side
Under Pitch per side, give the Top, Right, Bottom or Left slope its own pitch, in degrees or as x/12. Leave a box empty to use the pitch above. A side without a roof slope, such as the gable end of a gable roof or the high side of a shed roof, is grey: a pitch does nothing there.
11. A roof on one storey
Give a home with only a ground floor a sloped roof and the roof starts on top of the walls: Roof starts at is the floor height (2.60 m by default). No floor is added. The ground floor keeps its full height and counts in full. A roof can also start lower: type it in Roof starts at, for example 1.00 m on the first floor of a home with two storeys, so the roof runs up past where a second floor would be. A home with more storeys, an attic, a flat roof and an outbuilding start the roof on the floor (0.00 m). Remove roof only removes the roof.
12. Roof starts at
Right under the pitch, Roof starts at says how high the roof begins above the floor of this level, measured on the outside face of the façade where the roof rests on the wall: the eaves height. It starts at 0.00 m, on the floor; type 1.50 for 1.50 m of straight wall and then the roof. Type 2, 2.00 or 200 cm and press Enter; Esc puts the old value back. Higher than the wall height of the level is not possible: one line says so and the old value stays, as it does for text or a value under 0. A flat roof has no field; it sits at the wall height. The roof, the area under 1.50 m or 5 ft and the gross volume all start there; from 1.50 m up, Changes live says nothing is lower and everything counts. The number under Changes live is the same as in the measurement sheet for this level; with another standard it shows that standard’s own limit.
13. Dormers
Click Add dormer. Choose where it Faces, a Flat or Gable dormer roof, the Width, the Height inside, and its place From the left and From the wall. The area under 1.50 m or 5 ft in Changes live updates at once. Another side puts the dormer in the middle of that side, at the same distance from the wall; on an L, T or U shaped home, in the middle of the longest stretch of eave where the roof slopes towards that side, such as a side wing; with two eaves on that side, as on an L with a hip roof, the longer one. A side without a roof slope says (no slope) and cannot be chosen; a new dormer always goes on a slope. Remove dormer takes it away; each change is one undo step.
Parts on the screen
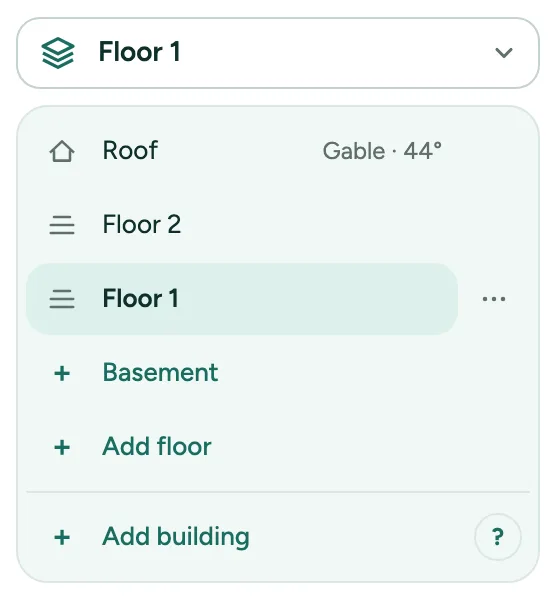
Building and floor. The floor field in the Plan panel says where you draw. Open it for every building and floor, with Add floor and Add building.
Shortcuts
- PgUp
- One level up
- PgDn
- One level down
- ⌥↑
- One level up
- ⌥↓
- One level down
Messages you may see
- Draw something first; there is nothing to turn yet.
- Fitted. Doors or windows that no longer fit were removed: 1.
- A floor can have up to 10 variants.
- Choose a pitch between 1° and 80°, for example 35°.
- A dormer needs a sloped roof. Choose another shape first.
- Higher than the roof, so this dormer does nothing. Make it lower or move it toward the eave.
- Curved or angled walls: the roof follows the rectangle around this level.